How to Switch Cameras in a Livestream Setup
A single locked-off camera can make a strong presentation feel static within minutes. A second angle changes the pace, shows demonstrations clearly, and gives viewers a visual reset without interrupting the speaker. If you searched for how to switch cameras livestream, the key is not simply choosing a button or app. It is building a workflow where every camera is matched, every source arrives on time, and switching does not disturb your audio.
A practical multi-camera setup can be as compact as two USB cameras and streaming software, or as capable as AI-tracked PTZ cameras feeding a dedicated live video switcher. The right option depends on your format, source count, network design, and how much control you need during the show.
Choose Your Camera Switching Method First
There are three common ways to switch cameras during a live production: software switching, hardware switching, and network-based switching. Each can deliver professional results, but they solve different operational problems.
Software switching for compact productions
Software is often the most direct path for creators, educators, remote presenters, and podcast teams. Connect cameras as USB or capture-card inputs, add each one as a scene, and assign keyboard shortcuts or a control surface to change views. Your streaming platform receives one finished program feed.
This method keeps costs and equipment footprint down. It also makes it easy to add lower thirds, screen shares, prerecorded clips, and graphics beside camera feeds. The trade-off is that your computer handles camera capture, encoding, graphics, and switching at once. A system that is comfortable with one 4K camera may struggle when several high-resolution sources, browser elements, and recording are active together.
For reliability, use a computer with adequate processing headroom, connect cameras directly rather than through overloaded USB hubs, and test the exact streaming resolution you intend to use. You may capture in 4K while streaming at 1080p, but make sure scaling does not create unnecessary load or inconsistent image quality.
Hardware switching for dedicated control
A live video switcher receives camera inputs and creates a single program output for your encoder, computer, recorder, or display. This is the preferred route when a show cannot pause for an operating-system alert, an application update, or a CPU spike. It is especially useful for events, houses of worship, corporate productions, and studio sessions with multiple operators.
A hardware switcher gives the operator physical source buttons, preview and program monitoring, and often direct access to transitions, picture-in-picture layouts, keying, and audio controls. CineTreak live video switchers are designed for this kind of multi-format livestreaming workflow, where camera sources need to be selected quickly and delivered as a stable program feed.
The trade-off is planning. You need compatible video outputs, correct cable runs, matched formats, and enough monitor outputs to see both preview and program. Hardware switching is less forgiving of mismatched frame rates or unexpected input changes, so format discipline matters before the livestream begins.
NDI switching for networked camera systems
NDI sends video, audio, and control data through a network instead of relying on a dedicated video cable for each camera. It is valuable when cameras are installed across a room, classroom, sanctuary, or office where long HDMI runs would be inconvenient. It also supports flexible routing: a camera can feed a switcher, a streaming computer, and a confidence monitor across the network when the infrastructure is properly designed.
An NDI workflow requires more than plugging cameras into an ordinary network. Use a reliable Gigabit network at minimum, preferably with managed switching for larger productions. Give cameras and production computers stable wired connections, avoid sharing critical production traffic with busy guest Wi-Fi, and confirm bandwidth capacity before adding multiple 4K sources.
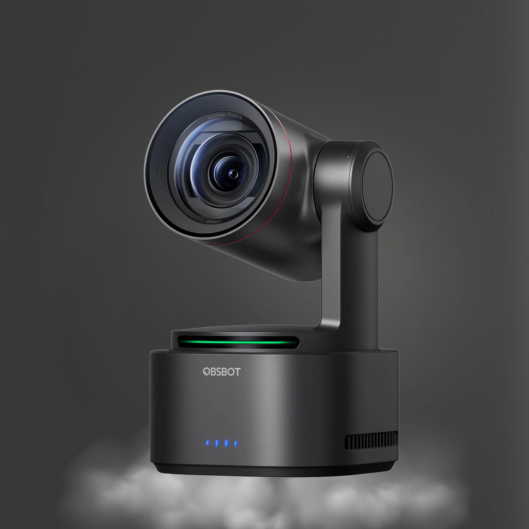
AI-powered PTZ and PTZR cameras add another advantage here. A camera such as an OBSBOT model with AI tracking can maintain framing on a presenter, while the operator focuses on switching to the right shot at the right moment. The automation reduces the workload, but it does not replace shot planning. Tracking needs to be tested for your stage size, subject movement, lighting, and background activity.
How to Switch Cameras Livestream Without Distracting Cuts
The best switching is usually the least noticeable. Viewers should understand why the angle changed: the camera follows the conversation, reveals a product detail, supports a screen demonstration, or moves to a wider view when a new person enters frame.
Build a source map before going live
Name every source by its purpose, not only by its camera number. “Host close,” “guest two-shot,” “product overhead,” and “slides” are faster to identify under pressure than “Cam 1” through “Cam 4.” Place sources in a consistent order across your software scenes, switcher inputs, monitor labels, and control buttons.
For a simple interview, a wide two-shot and one close angle per speaker are enough. For a product demonstration, add an overhead camera or close-up angle that shows controls, ports, or fine detail. Avoid adding cameras just because the switcher has more inputs. Every extra source requires framing, matching, monitoring, and an operator decision.
Match the cameras before you match the shots
A live cut between cameras with different exposure or color temperature is immediately visible. Set every camera to the same output resolution and frame rate. Then match white balance, brightness, shutter behavior, and picture profile as closely as the camera controls allow.
Auto exposure and auto white balance can be useful for mobile creators, but they can shift unexpectedly when a bright screen, white shirt, or product enters frame. In controlled indoor productions, manual settings generally create a more consistent program image. If AI tracking is active, verify that pan, tilt, and zoom movements are not too aggressive for the shot. A slower, intentional reframe often looks more professional than a camera constantly searching for the subject.
Keep one audio path in charge
Camera switching should not switch your main voice audio unless you have planned an audio-follow-video workflow. A presenter can move from a wide camera to a close-up while the microphone remains the same. Keeping audio independent prevents level changes, room tone shifts, and awkward moments where the selected camera has no usable sound.
Use a dedicated microphone source whenever possible. A CKMOVA conference microphone, shotgun microphone, lavalier, or vocal microphone should be selected according to the recording environment and speaking style, then routed consistently to the stream. Monitor it with headphones before the event. Clear voice capture will matter more to viewers than an extra camera angle.
If you need audio from a remote guest, a video clip, or a second presenter, test all sources together. Confirm that the audio remains synchronized with the final program feed, not only with the individual camera preview.
Use cuts as the default transition
A clean cut is fast, neutral, and appropriate for most livestreams. Switch when the speaker changes, when the host references an object, or when a visual action starts. It keeps conversational and instructional content moving without calling attention to the production controls.
Dissolves can work for reflective presentations, music, or polished opening sequences, but they can look slow in a live conversation. Wipes, spins, and elaborate effects are rarely helpful unless they are a deliberate part of the program design. For business presentations and educational streams, a controlled cut with matched camera framing is usually the better choice.
Use preview before program whenever your setup supports it. Preview lets you check that a PTZ camera has reached its preset, an overhead shot is in focus, or a guest is ready before viewers see the source. This one habit prevents many avoidable on-air mistakes.
Prepare PTZ Presets for Faster Switching
PTZ cameras are most effective when their positions are saved in advance. Create presets for a wide stage view, a speaker close-up, a product table, a whiteboard, and any other repeated framing. Name them clearly and test recall speed before the show.
Preset design should account for the movement of your production. A close-up may look excellent when the presenter stands at center stage but fail when they demonstrate an item at a side table. Build alternate presets rather than relying on manual pan and zoom during key moments.
AI tracking can complement presets. Use tracking when the speaker moves through a defined space, then switch to a preset when you need a stable product shot, audience view, or wide establishing angle. This combination gives a small team more control without requiring a dedicated camera operator for every angle.
Test Latency, Sync, and Failover
Before the first public livestream, run a full rehearsal using the same cameras, microphones, network, switcher, streaming computer, and destination settings. Watch the final stream on a separate device rather than relying only on local preview. That is where you will notice delay, audio sync issues, dropped frames, or a camera source that reconnects slowly.
Check these operational points during rehearsal:
- Confirm every camera delivers the same frame rate and expected resolution.
- Listen for audio delay after switching sources or adding graphics.
- Test PTZ presets, AI tracking boundaries, and manual override control.
- Disconnect and reconnect a noncritical source to understand recovery behavior.
- Verify that your internet upload speed has enough margin above your selected stream bitrate.
Select the Workflow That Fits the Show
A two-camera desktop stream may need nothing more than software scenes, USB cameras, and a dependable microphone. A recurring panel show benefits from PTZ presets and physical switching controls. A multi-room event may justify NDI cameras, managed networking, and a dedicated switcher. The most capable setup is not automatically the best one - the best setup is the one your team can operate confidently every time.
Start with intentional angles, a single dependable audio path, and clean cuts. Once those fundamentals are repeatable, add AI tracking, NDI routing, PTZ preset control, or more sources where they solve a real production need. That approach keeps your livestream looking controlled even as the production grows.