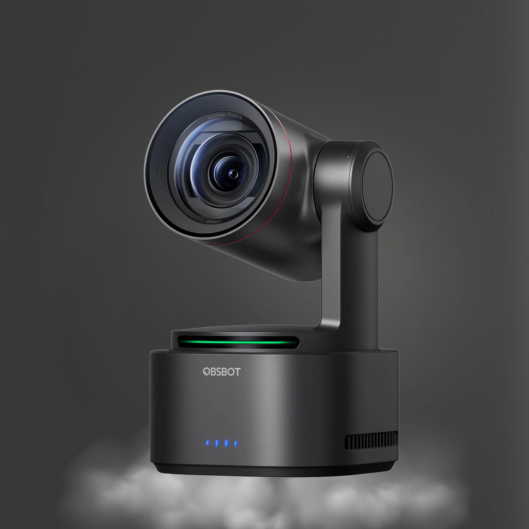
Choosing a Camera for Vertical Live Streaming
A vertical livestream gives you less room to hide poor framing. On a phone-first platform, the presenter’s face, product, hands, captions, and background all compete within a narrow 9:16 frame. The right camera for vertical live streaming is not simply a landscape camera turned on its side. It must hold a useful portrait composition, maintain sharp focus as the subject moves, and fit the way your production is controlled.
For a solo creator, that may mean an AI tracking camera on a desktop. For a church, education team, or event producer, it may mean PTZ movement, network video, and a switcher that can deliver multiple formats from one production. The best choice depends on the stream, not just the sensor specification.
Start With the Vertical Frame, Not the Camera Spec
Vertical video changes camera placement. A conventional wide landscape shot can show a full stage, two presenters, and visual context. Crop that image to 9:16 and much of the useful scene disappears. A camera positioned too far away may leave the subject small in the center, with empty space above and below. A camera positioned too close can make every small movement feel exaggerated.
Build the shot around the destination platform first. If the stream is intended for TikTok, Instagram Live, YouTube Shorts-style live content, or a vertical commerce feed, set the working canvas to 1080 x 1920 or another supported 9:16 format before you decide where the camera belongs. Test the real crop with graphics, lower thirds, screen shares, and product demonstrations in place.
A camera that outputs 4K gives the production more flexibility. A 4K image can be cropped into a clean vertical shot while retaining useful 1080p detail, especially when the subject is framed with extra space around them. That does not mean every vertical stream requires 4K delivery. Many platforms compress live video heavily. The practical benefit is cleaner reframing and a more adaptable source inside your production software or switcher.
Portrait orientation versus a vertical crop
There are two workable approaches. The first is true portrait orientation: mount or rotate the camera so its sensor is physically vertical. This uses the available image area more efficiently for a 9:16 output and is particularly effective for close creator presentations, product demos, and mobile-first interviews.
The second is a landscape camera feeding a vertical crop. This is often the better operational choice when one camera must serve both vertical and horizontal destinations, or when a multi-camera production needs a consistent stage view. The trade-off is that the vertical composition must be planned carefully. A wide shot may look acceptable in 16:9 but become unusable when cropped to 9:16.
Choose a camera and mounting method that make repositioning practical. A compact camera with a flexible mount can shift quickly between portrait and landscape. A fixed PTZ installation may be more effective when its preset positions are designed specifically for vertical output.
AI Tracking Keeps the Subject Inside the Shot
In vertical streaming, a small framing error is immediately visible. A presenter stepping to one side can leave the center of the frame empty. A demonstrator leaning over a table can move out of view just when viewers need to see the product. This is where AI tracking has a direct production benefit.
An AI-powered PTZ or PTZR camera can identify and follow a selected person, adjusting pan, tilt, and zoom to preserve the shot. The value is not movement for its own sake. It is reducing the need for a dedicated camera operator during a live session. For educators pacing through a lesson, fitness instructors, product hosts, and corporate presenters, tracking can keep the frame usable while the operator focuses on switching, graphics, chat moderation, or audio.
Tracking must be configured with restraint. Fast movement can feel distracting in a narrow vertical canvas, while aggressive zoom can cut off hands during a demonstration. Set a framing zone that includes the presenter’s natural movement area, then test tracking speed and sensitivity before going live. When hands, documents, or a tabletop product matter, a wider vertical shot is usually safer than a tight face-focused crop.
PTZ presets remain valuable even when AI tracking is active. A preset for the host, one for a product table, and one for a wider room view provide repeatable framing when the production needs to move away from the tracked subject. This combination of automated tracking and deliberate presets gives a small team more control without adding staffing pressure.
Select Connectivity for the Workflow You Actually Run
A camera can produce excellent video and still complicate the livestream if its output does not match the rest of the system. USB is efficient for a single-camera desk setup. It connects directly to a computer and works well for webinars, podcasts, remote training, and creator streams where software handles encoding and scene layout.
HDMI is a strong fit when a hardware switcher is central to the production. It allows the camera to join other sources such as a laptop, media player, or second camera. In a vertical workflow, confirm that the switcher or downstream encoder can create a 9:16 program output, or that the vertical crop will be built in the streaming software.
NDI is worth considering when cameras are installed across a studio, classroom, event room, or worship space. NDI sends video, audio, control, and often power-related workflow benefits across an IP network, reducing the need to run separate video cables to every camera position. It also supports remote PTZ control from the production position. The trade-off is network planning: reliable switches, sufficient bandwidth, and correct configuration matter as much as the camera itself.
For productions that serve horizontal and vertical channels at the same time, prioritize cameras and control systems that support flexible output routing. A 16:9 master feed can feed one destination while a separately composed 9:16 feed serves another. Do not assume one automatic crop will work for both. Vertical viewers need intentional framing, especially when text, guests, or product details are involved.
Image Quality Matters, but Exposure Matters More
A large sensor, 4K resolution, and high-quality optics create a stronger starting point, but lighting determines whether those capabilities show up in the final stream. Vertical video often uses tighter framing, which makes uneven skin tones, shiny product surfaces, and noisy shadows more obvious.
Place the key light near the camera axis and shape it so the presenter’s face remains evenly exposed through natural movement. For product livestreaming, add a separate light for the display area rather than forcing the face light to cover everything. Use manual exposure and white balance when the scene is stable. Auto settings can shift unexpectedly when a host raises a bright package, a screen changes, or someone walks through the background.
Autofocus is equally important. Look for reliable face detection or subject-aware focus if the presenter moves toward the camera. In a static studio shot, manual focus can be more consistent. Test it at the actual streaming distance, not only at the desk while setting up equipment.
Audio Cannot Be an Afterthought in a Narrow Frame
A portrait image keeps attention on the speaker, which makes weak audio even more noticeable. Camera microphones are useful for reference sound, but they are rarely the best final source in a professional stream. Use a microphone selected for the room and speaking style: a lavalier for mobile presenters, a shotgun microphone for controlled camera-facing work, or a vocal microphone for seated broadcasts and podcasts.
The audio path also needs to remain simple enough to operate live. Connect the microphone through a dependable interface, mixer, or switcher, monitor with headphones, and set gain before the audience arrives. If a camera and audio source reach the stream by different routes, check lip sync. A crisp vertical image paired with delayed speech immediately reduces perceived production quality.
Build a System That Can Grow Beyond One Stream
A single AI camera may be all a creator needs at first. As content expands, the same setup may need a second angle, a close product view, a presentation input, and a dedicated microphone. Planning for that growth avoids replacing every component later.
Kong Kei’s camera, switching, and audio categories are designed around that practical progression: intelligent cameras for subject control, multi-source production tools for live switching, and purpose-built microphones for intelligible speech. Select the first camera with its future role in mind. A compact USB model may be the right main camera for one person, while an NDI-capable PTZ camera can become the foundation of a larger installed workflow.
Before purchasing, run a five-minute test production in the exact vertical layout you plan to use. Walk through the shot, hold the product at normal presentation height, display the graphics, play the video clip, and listen on the device your audience is most likely to use. The camera that keeps the important action visible and the workflow controllable is the one that will keep earning its place after the first livestream.