CKMOVA Microphones for Clearer Production Audio
A sharp 4K image will not rescue a livestream with hollow dialogue, handling noise, or a presenter buried under room echo. CKMOVA microphones address that part of the production chain with purpose-built options for conference rooms, camera-mounted recording, wireless lavalier capture, and vocal work. The right choice is not simply the most expensive microphone. It is the one whose pickup pattern, placement, connection, and operating method fit the job.
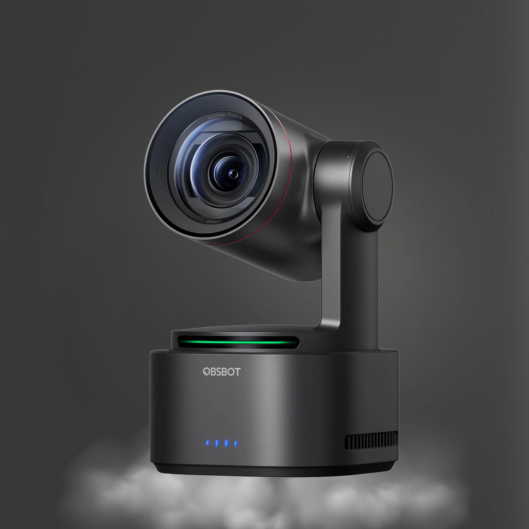
For creators and AV teams building a complete production setup, audio should be specified alongside the camera and switcher, not added at the end. A compact AI PTZ camera can keep a subject framed automatically, but the microphone still needs to isolate that subject from the room, audience, fans, and equipment noise.
Where CKMOVA Microphones Fit in a Production Setup
CKMOVA microphones cover several distinct capture scenarios. The most useful starting point is to identify the sound source and how close the microphone can be placed. A microphone positioned close to a speaker generally delivers more direct voice and less room sound than one mounted several feet away. That basic principle matters more than a long feature list.
For a one-person talking-head video, a lavalier or compact wireless system keeps the microphone close while allowing the presenter to move. For an interview shot with a boom operator or an on-camera setup, a shotgun microphone can focus on speech from the direction it is aimed. For meetings, training, and hybrid conference calls, a dedicated conference microphone may be the better fit because it is designed to capture multiple participants around a table or within a defined area.
Vocal microphones serve a different need. They are typically selected for close, intentional use: podcasting, voiceovers, presentations, singing, and broadcast positions. In these situations, consistent mic technique and controlled gain are as valuable as the microphone itself.
Match the Pickup Pattern to the Room
Pickup pattern describes the directions from which a microphone captures sound most effectively. It is a practical buying consideration, particularly when a production takes place in a reflective office, classroom, sanctuary, or event space.
Shotgun microphones for directed capture
A shotgun microphone is designed to emphasize sound arriving from the front while reducing unwanted sound from the sides. It is a strong option for camera-mounted shooting, boom placement, interviews, documentary work, and compact studio environments. Its narrow forward focus helps when the microphone can be aimed precisely at the speaker.
There is a trade-off. A shotgun microphone does not remove room echo by itself. If it is mounted on a camera several feet from the presenter, it will still hear the room. Move it closer on a boom or stand whenever possible. For indoor dialogue, placement often produces a greater improvement than changing to a more directional model.
Lavalier microphones for moving presenters
Lavalier microphones are effective when a presenter needs to walk, demonstrate a product, teach from a whiteboard, or appear in a wide shot. Clipping the mic near the upper chest provides a stable distance from the mouth and keeps the audio level more consistent as the subject moves.
Wireless lavalier systems add flexibility, but they introduce workflow checks. Confirm battery status before every session, inspect the cable and connector, monitor the receiver output, and perform a short range test in the actual location. Clothing movement, jewelry, and wind can create noise, so placement should be tested with the wardrobe the presenter will wear on camera.
Conference microphones for shared voices
Conference capture has a different goal from close-mic podcasting. A meeting table may include several speakers, laptops, paper movement, HVAC noise, and remote participants listening through a video platform. A conference microphone should be positioned to provide even coverage across the speaking area while remaining clear of keyboard impact and handling noise.
For larger rooms, one microphone in the center is rarely the complete answer. Multiple microphones or a more deliberate room-audio system may be required, depending on seating layout and acoustic treatment. The practical question is whether every participant can speak at a natural level and still be understood by remote listeners.
Vocal microphones for controlled close use
A vocal microphone works best when the speaker stays near the capsule and maintains a reasonably consistent angle. This makes it a suitable choice for podcast desks, commentary positions, studio presentations, and voice recording. A directional vocal mic can help reduce ambient noise from the sides and rear, but it also rewards disciplined positioning.
Use a stand or boom arm to keep the microphone stable. Set the presenter slightly off-axis rather than directly into the capsule if plosives on words beginning with P and B are excessive. A pop filter can further reduce bursts of air without forcing the speaker to back away from the microphone.
Connection and Compatibility Matter
Before choosing from CKMOVA microphones, identify where the audio will enter the production chain. A camera, computer, smartphone, audio interface, recorder, video switcher, and wireless receiver may use different connectors, output levels, and power arrangements. A microphone can be excellent for its intended use yet be inconvenient if it does not connect cleanly to the equipment already in place.
Check whether the setup requires analog 3.5 mm input, USB audio, XLR, or a dedicated wireless receiver. Also verify whether the camera input supports microphone-level audio, whether plug-in power is needed, and whether the device has a headphone output for live monitoring. In a livestream, monitoring is not optional. It is the only reliable way to catch interference, a loose connector, distortion, or an unexpectedly noisy room before viewers mention it in chat.
Gain staging deserves the same attention. Set input gain so normal speech is strong but leaves headroom for emphasis and laughter. If the level is too low, increasing it later raises the room noise along with the voice. If it is too high, clipping creates distortion that cannot be repaired cleanly.
Build Audio Around the Real Workflow
The best microphone choice depends on whether the production is recorded, live, mobile, or managed by a small team. A solo creator may prioritize fast setup and direct camera connection. A corporate communications team may value consistent conference coverage and simple USB integration. A multicamera event producer may need reliable wireless mobility, monitored audio routing, and a clear handoff to a switcher or external mixer.
Consider the environment as part of the specification. A treated studio gives nearly any close microphone a better chance of sounding polished. A glass-walled meeting room, busy trade-show floor, or reverberant hall demands more careful placement and more realistic expectations. Directionality helps, but no microphone can fully isolate a speaker from a loud sound source directly beside them.
At Kong Kei Industrial, CKMOVA options fit naturally beside cameras, live switchers, and creator-focused control tools because audio capture needs to work as part of one signal path. Confirm the intended device connection, mounting method, power requirements, and monitoring plan before ordering. That prevents a common production delay: having the right microphone category but not the right cable, receiver, adapter, or input.
A Fast Pre-Production Audio Check
Run a short sound check before recording or going live. Have the presenter speak at their normal volume, then at their loudest expected volume. Listen on headphones for room reflection, rubbing from clothing, air-conditioning noise, and intermittent wireless interference. Record a test clip and listen back through the same computer or switcher path used for the production.
If the voice sounds distant, improve placement before adding processing. If the voice is clear but too quiet, adjust gain gradually. If the room dominates the recording, bring the microphone closer or move the speaker away from hard reflective surfaces. These fixes are faster and more reliable than trying to repair poor capture with software after the session.
Clear production audio starts with a microphone chosen for the speaker, the space, and the signal path. When those three elements align, viewers can focus on the presentation instead of the problems behind it.