How to Reduce Webcam Noise in Low-Light Video
A webcam can look sharp in a bright office and fall apart as soon as a presentation runs late, a stream moves into the evening, or a studio relies on practical lighting. To reduce webcam noise, start by treating the issue as an imaging problem, not a software problem. The colored speckles, crawling shadows, and soft detail in your picture are usually the camera compensating for too little light.
That compensation has limits. When a small image sensor raises gain to brighten a dark scene, it also amplifies unwanted electronic signal. Noise reduction can conceal some of it, but it cannot recreate the detail the camera never captured. A cleaner result comes from balancing light, exposure, camera settings, and the capabilities of the webcam itself.
What Webcam Noise Actually Means
Webcam noise is random visual texture that becomes most visible in dark areas, skin tones, and flat backgrounds. It may appear as grain, colored pixels, flickering blocks, or smeared detail after compression. It is different from audio noise, although a poor recording environment often creates both problems at once.
Low light is the most common cause. A webcam needs enough light to expose the scene without pushing sensor gain too high. If the room is dim, automatic exposure may raise ISO or digital gain, slow the shutter speed, or both. High gain creates grain. A slow shutter can create motion blur, particularly when you gesture, type, or move through a tracked shot.
Compression can make the problem more obvious. Video conferencing platforms and livestream encoders allocate fewer bits to a noisy image because it is difficult to compress. Instead of a smooth shadow, viewers may see blockiness and shifting texture. Improving the original camera image gives the encoder less damage to manage.
Reduce Webcam Noise by Adding Useful Light
The fastest technical upgrade is usually not a new camera. It is controlled front light. Position a soft key light in front of you and slightly above eye level, aimed toward your face rather than directly into the lens. This increases exposure where the audience needs detail most, letting the camera use lower gain.
A large, diffused source is more forgiving than a bare desk lamp. Soft light reduces hard facial shadows, which are areas where noise becomes prominent. A compact LED panel with diffusion, a softbox, or a window with indirect daylight can all work. Window light is effective, but it changes throughout the day and can create mixed color temperatures when combined with indoor lamps.
Avoid relying on a ceiling fixture as the only source. Overhead light often leaves the eye sockets and lower face underexposed while creating a bright background or shiny forehead. The webcam sees the scene as a high-contrast challenge and may increase gain unnecessarily.
Background lighting also matters, but it comes second. Add a modest practical light or fill light behind you only after your face is properly exposed. A bright window or monitor behind the subject can force the camera to darken the face. Either reduce the background brightness, change the camera angle, or increase the key light enough to restore a balanced exposure.
Match the light to the production format
For a 30 fps webcam feed, shutter speed is often set near 1/60 second to preserve natural motion. In a 60 fps workflow, the camera generally needs a faster shutter and therefore more light. This is why a setup that looks acceptable for a 30 fps conference call may show more noise when switched to 4K 60 fps for a livestream.
Higher frame rates are useful for movement and live production, but they are not free. If the lighting budget is limited, a clean 4K 30 fps image can be more professional than a noisy 4K 60 fps image.
Set Exposure Before Applying Noise Reduction
Automatic settings are convenient, but they react to changes in the scene. A bright screen, a white shirt, or a hand entering the frame can cause exposure to shift during a recording. For repeatable work, use manual control when the camera software provides it.
Start with the shutter speed that fits your frame rate, then add enough light to expose the face correctly. Keep gain or ISO as low as practical. Finally, set white balance manually after the lighting is in place. Auto white balance can cause color shifts that make low-light noise look worse, especially under mixed LED and daylight sources.
Do not underexpose with the expectation that you will brighten the video later. Raising shadows in editing or streaming software also raises noise. It is better to expose the subject correctly in-camera while protecting obvious highlight sources, such as windows and screens.
Monitor the image at its actual delivery size. A feed can look acceptable in a small camera preview yet reveal noise when viewed full-screen or sent through a streaming encoder. Record a short test clip, include normal gestures and head movement, and inspect dark areas of the frame before a live session.
Camera Settings That Can Help - and Hurt
Most camera applications offer image controls that affect perceived noise. These controls should be adjusted with restraint because aggressive processing can replace grain with waxy skin, broken edges, or temporal smearing.
Use these settings in this order:
- Set resolution and frame rate for the platform and available lighting. Do not select 60 fps only because the option is available.
- Disable or limit digital zoom. Cropping magnifies both the subject and sensor noise.
- Apply modest in-camera noise reduction only after improving light and exposure.
- Keep sharpening low to moderate. Excess sharpening outlines noise and makes compression artifacts more visible.
- Lock exposure and white balance for fixed desk, classroom, and studio setups.
Virtual backgrounds deserve the same caution. Segmentation software has to identify fine hair edges and subject movement, then the computer must encode the altered frame. In a dim, noisy image, those edges are harder to detect. Better front light improves both the camera picture and the reliability of background effects.
Choose Hardware That Fits the Room
A better webcam provides more flexibility, but its advantage is most visible when the rest of the system supports it. Look beyond headline resolution. Sensor performance in low light, lens aperture, manual exposure control, processing quality, and reliable output formats all influence the final feed.
A 4K camera can provide cleaner detail for 1080p delivery through downsampling, provided the sensor and lighting are adequate. It also gives operators room to crop or create tighter framing without relying on heavy digital zoom. However, 4K does not eliminate noise by itself. A poorly lit 4K image is still a poorly lit image, just with more pixels describing the problem.
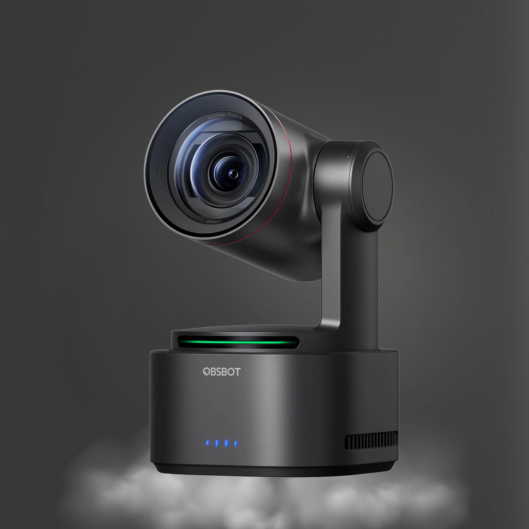
For teaching, presentations, houses of worship, and multi-person livestreams, an AI-powered PTZ or PTZR camera can improve consistency by keeping the speaker framed as they move. Accurate tracking prevents the common workaround of using a wide shot and cropping aggressively. With the subject larger in the frame and correctly lit, the production can retain more usable detail.
For professional workflows, consider how the camera connects to the rest of the system. USB is practical for a single desk setup. NDI can be valuable when cameras are networked across a studio, classroom, or event space and need centralized routing or switching. The network workflow does not directly remove sensor noise, but it can support better camera placement and a more controlled production layout.
Do Not Ignore the Computer and Stream Settings
A clean camera feed can still degrade when a computer is overloaded or the encoder is set too aggressively. Close unnecessary applications before streaming, especially apps that use the GPU or access the camera. Confirm that the webcam is connected to a suitable USB port and avoid unstable hubs when possible.
In OBS or similar production software, do not stack multiple filters without testing. A mild noise-reduction filter may help a borderline image, but heavy denoising, sharpening, and background processing can introduce delay or make movement look unnatural. Start with the best camera signal, then use processing for small corrections.
Your streaming bitrate and platform limits also matter. A dim background full of grain consumes detail budget quickly. Simplifying the background, adding controlled light, and reducing unnecessary motion can produce a noticeably cleaner stream at the same bitrate.
A Practical Test Before You Go Live
Build a repeatable check for every room. Turn on the actual lights you will use, place the subject where they will stand or sit, and view the camera at the final resolution and frame rate. Check facial shadows, the background, movement, and any bright displays in the shot. Then lock the settings that should not change.
If the image still looks noisy, add or reposition light before increasing software processing. If the light is already sufficient, lower the frame rate, reduce gain, or evaluate whether the webcam is reaching its low-light limit. That method is faster than random slider adjustments and produces a setup that holds up during an entire broadcast.
For creators building a compact production system, Kong Kei Industrial pairs AI camera options with switching and dedicated audio equipment so the image, control, and sound path can be planned together. The goal is not a perfectly sterile frame. It is a stable, well-exposed image that keeps attention on the presenter, lesson, performance, or message.