How to Build a Multicamera Studio That Scales
A single locked-off camera can document a presentation. A multicamera studio can direct attention: wide shot for context, close shot for authority, product angle for detail, and a clean cut that keeps the program moving. Knowing how to build a multicamera studio starts with that production goal, not with buying the highest-spec camera available.
The most effective systems are designed around a repeatable signal path. Every camera needs a framing purpose, every audio source needs a controlled route, and the operator needs one practical way to monitor and switch the show. Build that foundation first, then add higher-resolution cameras, PTZ movement, AI tracking, or NDI connectivity where they reduce real production work.
Plan the Multicamera Studio Around the Show
Before choosing equipment, define what the studio must produce. A corporate training room may need one presenter, a demonstration table, and remote guests. A podcast studio may require two host close-ups, a shared wide shot, and isolated microphone feeds. A house of worship or event setup may need long camera runs, live graphics, projection feeds, and quick reactions from an operator.
Write down the program outputs as well. A 16:9 4K recording, a 1080p livestream, and vertical social clips create different framing and switching requirements. If you need simultaneous landscape and portrait production, place cameras with enough image area and flexible framing to protect both deliverables. Trying to crop every shot after the fact can make a well-lit 4K image look poorly composed.
Start with three purposeful views rather than several redundant ones. Camera one is usually the master wide shot. Camera two provides a medium or close presenter shot. Camera three handles a product, whiteboard, second speaker, or alternate profile angle. This arrangement gives the switcher meaningful choices without forcing an operator to manage unnecessary sources.
Choose Camera Roles Before Camera Models
Fixed cameras work well when the subject stays in a defined position and the composition rarely changes. PTZ cameras add remote pan, tilt, and zoom control, making them valuable in conference rooms, classrooms, worship spaces, and compact studios where a camera operator is not available.
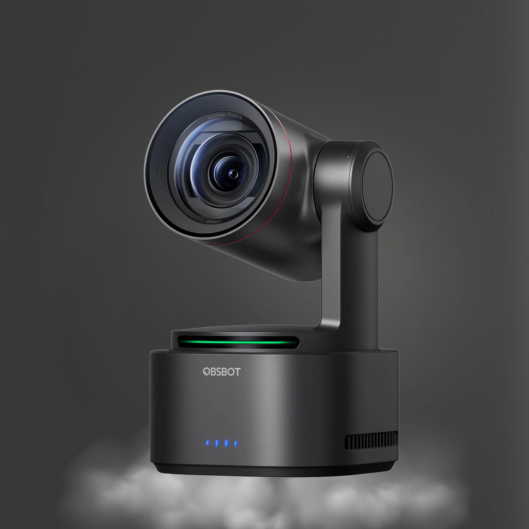
AI-powered PTZ or PTZR cameras are especially useful when one person must present and produce at the same time. Subject tracking can maintain a usable medium shot while the speaker moves across a presentation area. It is not a replacement for intentional direction: define a tracking zone, test it with the real stage layout, and retain a static wide shot as a safe cutaway.
Image matching matters more than chasing an isolated specification. Cameras should have compatible resolution, frame rate, color controls, and exposure behavior. A 4K camera can be a smart purchase even for a 1080p stream because it gives you cleaner downscaled output and more room for recording or reframing. But if the switcher only accepts a limited format, configure every camera to the same supported output before the first live test.
How to Build a Multicamera Studio Signal Path
A reliable studio has a simple chain: cameras and computers feed a switcher, the switcher sends program video to streaming or recording, and audio is mixed before it reaches the final program. The details vary, but clear signal ownership prevents the common problem of having good equipment that cannot talk to the rest of the system.
HDMI is practical for short runs in desk-based studios. SDI is generally the better choice for longer cable distances and environments where connectors may be handled often. NDI carries video, audio, and control over a network, reducing dedicated video cabling and allowing flexible routing between rooms. It depends on a properly designed network, however. Do not treat NDI cameras as ordinary office-network devices when multiple 4K streams are involved.
Decide Between HDMI, SDI, and NDI
Choose the connection type based on distance, scale, and operator needs. HDMI keeps a small room economical and straightforward. SDI supports dependable long cable runs and is familiar to many event and broadcast teams. NDI is compelling when cameras, control, graphics, and streaming computers need to share an organized network infrastructure.
For an NDI workflow, use wired Ethernet, managed network hardware, and enough bandwidth for the actual number of simultaneous sources. Keep camera IP addresses documented, reserve addresses when practical, and test discovery and control before a live production day. A networked system can be easier to expand than a cable-heavy studio, but only if the network is treated as production infrastructure.
The switcher is the operational center. Select one with enough inputs for your current sources plus at least one spare for a laptop, playback device, or guest camera. Confirm the number of downstream keyers, media players, multiview outputs, audio inputs, and recording options you actually need. A compact live video switcher may be ideal for a three-camera creator studio, while a more advanced unit makes sense for graphics-heavy productions with multiple displays and dedicated operators.
Set up a multiview monitor so the operator can see every camera, program output, preview output, audio meters, and key source at once. Preview-before-program switching is a major reliability advantage. It lets the operator confirm a camera is framed, exposed, and in focus before taking it live.
Treat Audio as a Separate Production System
Audiences will tolerate an occasional camera cut that is slightly late. They will leave when dialogue is hard to understand. Build the audio chain with the same discipline as video: choose the microphone for the voice and room, control gain, monitor with headphones, and send a stable mix to the switcher or streaming encoder.
A lavalier microphone is efficient for a moving presenter and can stay visually discreet. A shotgun microphone works when it can be placed close enough above or in front of the subject without entering the frame. For podcast and desk-based formats, dynamic vocal microphones can reduce room pickup when positioned correctly. Conference microphones and spatial audio solutions serve different needs, particularly when several people speak around a table.
Avoid relying on a camera-mounted microphone for a studio program. It captures the room from the camera position, not the speaker position. Use balanced audio connections where available, and set consistent gain structure from microphone or wireless receiver through mixer and switcher. Add a short audio delay only when necessary to align sound with video processing latency.
Build for Controlled Light and Repeatable Framing
Better lighting often improves the perceived quality of an image more than replacing a camera. Use a soft key light to shape the subject, then add controlled fill or practical background lighting as needed. Keep color temperature consistent across fixtures. Mixed window light, warm room lights, and cool LEDs make camera matching harder and can shift during a long stream.
Lock critical camera settings once the set is lit. Automatic exposure and white balance can be useful in changing environments, but they may visibly react when a presenter raises a bright product box or a slide changes on a display. Manual or carefully constrained settings deliver more consistent cuts between cameras.
Give each shot a reason to exist. The wide camera should show the environment without making the presenter too small. The close camera should provide eye-level connection. Product and overhead shots need lighting that reveals texture without glare. For PTZ presets, create positions for the opening shot, standing presentation, seated conversation, product demo, and an empty safe frame. Name the presets clearly so another operator can run the room without guessing.
Test the Studio Like a Live Production
Do not finish the installation when the video appears on a monitor. Run a complete rehearsal at the intended resolution and frame rate. Have the presenter move, trigger graphics, share a computer screen, play any required clips, and record the entire program. Review the recording for dropped frames, camera color mismatches, network instability, audio noise, focus shifts, and lip-sync errors.
Create a short preflight procedure that the team can repeat before every session. It should confirm power, camera framing, lens cleanliness, network connection, switcher input formats, microphone battery status, audio meters, recording media, stream destination, and backup recording. These checks take minutes and prevent the failures that are expensive to explain after a live event.
Keep a practical backup path. That may mean a second recording destination, spare HDMI or SDI cable, a backup microphone, a static wide camera, or an alternate internet connection for critical streams. The right level of redundancy depends on the cost of failure. A weekly internal meeting needs less duplication than a paid live event, but both benefit from a tested fallback.
Expand Only Where Production Needs It
Once the core workflow is stable, add capability based on a bottleneck. If one person cannot keep a speaker framed, add AI tracking. If cable routing is limiting room design, consider NDI. If every episode needs product detail, add a dedicated close-up camera. If operators are missing cues, improve multiview monitoring and communication before adding another input.
A compact system built from compatible AI cameras, a capable switcher, and purpose-built microphones can outperform a larger collection of disconnected gear. Kong Kei Industrial's camera, switching, and audio categories are designed around this kind of integrated production workflow, where control and signal compatibility matter as much as individual specifications.
Build the studio around the show you need to repeat next week, not the biggest setup you can imagine today. A clear signal path, intentional camera roles, controlled audio, and tested operation will give every future upgrade a stable place to work.