Multi Camera Livestream Switcher Buying Guide
A one-camera stream can look polished until the presenter turns to a demo, a guest joins remotely, or a live event needs a second angle immediately. A multi camera livestream switcher gives the operator control of that moment: cut from a wide shot to a close-up, bring in presentation graphics, roll a video clip, or move to a backup source without interrupting the program feed.
For creators, educators, worship teams, corporate AV departments, and small production studios, the right switcher is not simply a box with HDMI inputs. It is the center of a production workflow. Its input formats, video standards, audio controls, camera-control options, streaming output, and physical interface determine how easily a crew can produce live content under pressure.
What a Multi Camera Livestream Switcher Does
A switcher receives multiple video sources and selects which one becomes the program output. Sources may include PTZ cameras, 4K webcams, laptops, media players, remote callers, document cameras, or a playback computer. Rather than changing cables or relying on a single computer screen, the operator can preview the next shot, make the transition, and maintain a consistent live feed.
Most live switchers also add production functions that reduce the need for separate equipment. Depending on the model, these can include multiview monitoring, picture-in-picture layouts, chroma keying, still graphics, lower thirds, transitions, recording, USB webcam output, and direct streaming through Ethernet. Higher-specification models may add SDI connections, 4K switching, independent auxiliary outputs, advanced audio mixing, and network-based video workflows.
The practical benefit is control. A product launch can alternate between a presenter, product close-up, slide deck, and remote guest. A church service can keep a worship leader, speaker, audience, and lyrics ready at the same time. A training team can preserve eye contact on camera while switching to a software demonstration at the right point.
Choose Inputs Before Features
The first buying decision is not the transition style or streaming app compatibility. It is the sources you need to connect now and the sources you expect to add later. Count cameras, computers, media playback devices, and remote-feed converters separately. Then add at least one input for growth or an emergency source.
HDMI is common in compact creator and conference workflows. It works well with many cameras, laptops, and wireless video receivers, but cable length can become a limitation in larger rooms. SDI is more appropriate when cameras are positioned farther from the control station or when the environment demands locking connectors and long cable runs. Some production systems use both: HDMI for nearby laptops and SDI for fixed cameras across a stage or auditorium.
Match the switcher to the resolution and frame rate of your actual cameras. A 4K-capable switcher is valuable for 4K delivery, recording, and image cropping, but 4K support is not always identical across every input, output, scaler, and USB connection. Confirm whether the unit switches in native 4K, converts sources internally, or limits certain outputs to 1080p.
Frame rate deserves the same attention. A 60 fps sports, product-motion, or gaming workflow needs an end-to-end signal path designed for that rate. Mixing 24, 30, and 60 fps sources can be possible when conversion is available, but it can introduce latency or reduce image consistency. A stable live show starts with cameras configured to a common standard.
HDMI, SDI, USB, and NDI Serve Different Jobs
USB cameras are convenient for a desk setup, but most hardware switchers do not accept USB camera feeds directly. They usually need HDMI, SDI, or network video. A USB camera is often better connected to a host computer running production software, while a dedicated camera with HDMI, SDI, or NDI is easier to integrate into a hardware-based live system.
NDI can reduce cable complexity by sending video, audio, control data, and sometimes tally information across a managed network. It is especially useful for PTZ cameras installed in meeting rooms, classrooms, studios, and houses of worship. However, NDI is not a shortcut around network design. Bandwidth, switch capacity, power over Ethernet, IP addressing, and network reliability all matter. A dedicated or properly managed production network is preferable to placing critical live video on an overloaded office network.
Camera Control Can Reduce Crew Requirements
A live switcher becomes more valuable when it can work with PTZ camera control. Instead of assigning one person to operate every camera, an operator can recall presets for a podium, interview chair, product table, or stage position. AI-powered tracking cameras can further reduce manual reframing when the subject moves, though tracking should be tested before a live event with the actual background, lighting, and movement pattern.
Control compatibility varies widely. Some systems use Ethernet protocols, some rely on serial control, and others require a separate controller or software application. Do not assume that connecting a camera's video output also provides pan, tilt, zoom, focus, or preset recall. Verify the control method, supported protocol, network requirements, and whether camera control can be accessed from the switcher itself.
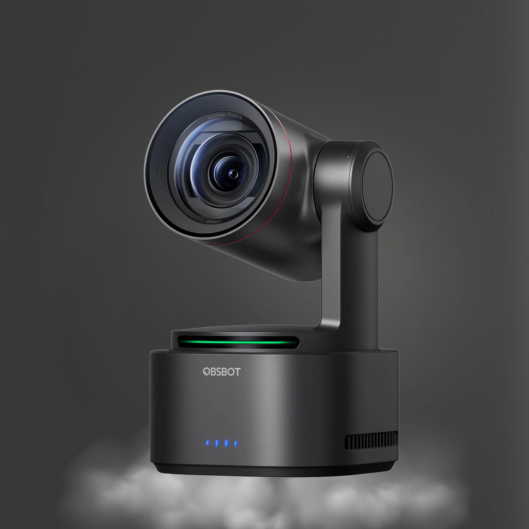
For a compact production workflow, pairing intelligent OBSBOT PTZ or PTZR cameras with an appropriate switching and control setup can provide a practical balance of automated framing and operator oversight. Automation handles repeatable camera behavior well, but a trained operator still makes the editorial decisions: when to cut, what to show, and when a close-up adds value instead of distraction.
Evaluate Audio as Part of the Switching System
Viewers will tolerate an occasional imperfect camera angle longer than they will tolerate poor speech intelligibility. Your multi-camera plan therefore needs an audio plan. Identify whether sound will come from camera microphones, wireless lavaliers, shotgun microphones, a podcast mixer, or a venue console.
A switcher's audio inputs may be sufficient for a simple two-person stream, particularly when using a dedicated microphone mixer upstream. For panels, events, and worship services, it is often better to mix audio on a purpose-built console and send a clean stereo feed into the switcher. This gives the audio operator independent control of gain, EQ, compression, mix-minus, and monitoring.
Check for audio delay adjustment. Video processing, frame conversion, and capture devices can shift picture timing, while audio may arrive immediately from a mixer. If voices do not match lip movement, the final stream will feel unprofessional even when the camera work is excellent. A switcher or audio path with delay control gives you a way to align the program.
Streaming, Recording, and Monitoring Need Separate Decisions
Some switchers stream directly to major platforms through Ethernet. This can simplify deployment and remove a computer from the critical signal path. It is a strong option for repeatable events where the destination, bitrate, and encoding settings are already known.
A computer-based encoder offers more flexibility for custom graphics, remote guests, multiple destinations, and software workflows. The trade-off is additional operating-system, driver, and application complexity. For many teams, the dependable approach is a hardware switcher for source selection and a dedicated computer only where software production adds a clear benefit.
Recording is equally worth planning. A program recording captures the finished switched show and is useful for fast publishing. ISO recording captures individual camera feeds, allowing an editor to rebuild the show later. Not every switcher records, and not every recorder supports the resolution, codec, media type, or number of channels required. If post-production matters, decide whether a clean program record is enough before purchasing.
Multiview output should not be treated as a minor feature. A serious operator needs to see preview, program, audio meters, media status, and all active sources at once. On a small desk, one monitor may be adequate. At an event, a larger dedicated display makes camera labels, focus issues, and accidental source changes easier to catch before they go live.
Build for the Show You Run Most Often
It is easy to overbuy for hypothetical productions or underbuy based on a single simple stream. Start with the show you run repeatedly. A creator producing interviews may need three HDMI inputs, USB output, basic audio, and a compact control surface. A corporate communications team may prioritize PTZ presets, presentation computers, remote feeds, and dependable 1080p delivery. An event producer may need SDI, multiple auxiliary outputs, redundant power planning, and a more capable audio integration.
Also consider the physical operating environment. Small tactile buttons are fast in a live situation, while a touchscreen interface can provide deeper control in a compact footprint. A fanless unit may be preferable for quiet desktop recording. Rack mounting, cable strain relief, power distribution, and transport cases become more significant as the system moves from a studio desk to recurring venues.
Before the first public stream, run a full rehearsal at the intended resolution and bitrate. Test every source, camera preset, microphone, transition, network path, recording medium, and backup plan for at least the expected show duration. The best multi-camera workflow is not the one with the longest specification sheet. It is the one your team can operate confidently, monitor clearly, and repeat reliably when the event is live.
A well-matched switcher turns separate cameras, microphones, and displays into a production system with a clear purpose: keep the audience focused on the message, not the mechanics behind it.