How to Balance Livestream Audio for Clear Streams
A 4K camera can make a stream look premium, but viewers will tolerate a soft image longer than harsh, uneven, or unintelligible sound. To balance livestream audio, build the mix around the voice, set clean gain before processing, and monitor the program feed rather than relying on meter movement alone. The goal is not maximum loudness. It is stable speech, controlled transitions, and enough headroom to handle a laugh, applause, music cue, or unexpected guest.
Start With the Signal Chain, Not the Mixer
Audio problems often begin before the signal reaches streaming software or a video switcher. A microphone with the wrong pickup pattern, placed too far from the speaker, forces excessive gain. That raises room noise, keyboard clicks, HVAC rumble, and camera handling noise along with the voice.
Choose the capture tool for the source. A lavalier microphone gives presenters freedom of movement and keeps level more consistent as they turn toward an AI-tracking camera. A shotgun microphone is useful when it can be positioned just outside the frame and aimed precisely at a seated speaker. For podcasts, voiceovers, and fixed presenter positions, a vocal microphone with a focused pickup pattern can deliver a closer, more controlled sound.
Placement still matters more than price. Move the microphone closer before adding gain or aggressive noise reduction. Keep a vocal microphone angled slightly off-axis to reduce plosives, and avoid aiming a shotgun at reflective walls, ceilings, or loud computer equipment. For conference rooms, position microphones so every active speaker is within a usable pickup range instead of expecting one distant microphone to solve the room.
A clean path also requires the right connection type. USB microphones offer a compact solution for single-host streams. XLR microphones connected through an audio interface, mixer, or production switcher provide more input control and are generally the better choice for multi-person productions. If audio is embedded into a camera, confirm the camera input level is set correctly before it reaches the switcher or encoder.
Set Gain for Headroom Before You Process
Gain staging is the foundation of every dependable live mix. Ask the presenter to speak at their natural on-air volume, then have them deliver the loudest likely line. Set the input gain so normal speech sits comfortably below clipping and loud peaks still leave margin. Exact meter targets vary by mixer and software, but the principle does not: never set levels by whispering into the microphone, and never allow the input to reach 0 dBFS.
For a digital streaming workflow, normal speech often works well when it averages around -18 to -12 dBFS, with stronger peaks landing roughly around -10 to -6 dBFS. That leaves room for sudden emphasis without audible distortion. If your platform applies loudness normalization, a final program level near its published target can help, but input headroom comes first.
Do not use a compressor to repair a clipped preamp. Once an analog preamp or digital input clips, the distortion is already part of the signal. Lower the source gain, then use compression only to reduce the gap between quiet words and loud phrases.
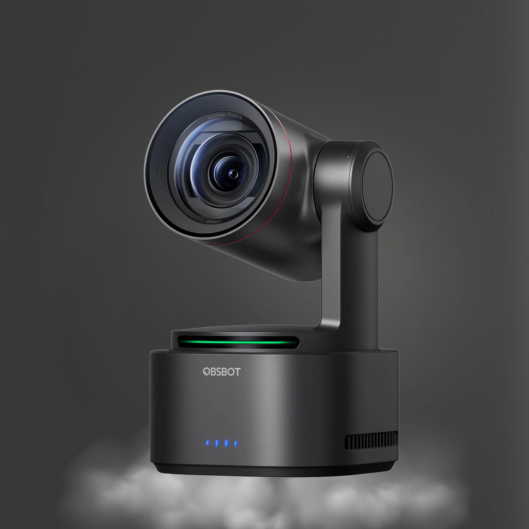
This distinction is especially relevant in a compact setup with an OBSBOT camera, a microphone, and a laptop. Camera tracking may keep the presenter visually centered, but it cannot correct audio that is entering the stream too hot. Treat camera control and audio gain as separate checkpoints in the setup process.
Apply Processing With a Light Hand
A high-pass filter is often the first useful tool. It removes low-frequency vibration, desk bumps, air conditioning rumble, and traffic noise that do not contribute to speech clarity. The appropriate cutoff depends on the voice and microphone, but excessive filtering can make a voice thin.
Use EQ to solve specific problems, not to create a dramatic sound. A small reduction in muddy low-mid frequencies can improve intelligibility in untreated rooms. A modest presence boost may help a voice cut through music, though too much can emphasize sibilance and listener fatigue.
Compression should be moderate for live speech. Start with a low ratio, a threshold that engages on louder phrases, and settings that preserve natural speech rhythm. Heavy compression may make a presenter sound consistently loud, but it also brings up room noise between sentences and makes breath sounds more noticeable. A limiter at the final output is a safety net for brief peaks, not a substitute for correct gain staging.
Noise suppression and gates have their place, especially in home offices and shared workspaces. However, overly aggressive settings can remove word endings, create digital artifacts, or chop off quiet speech. If the room remains noisy, improve microphone distance and placement before increasing software processing.
Balance Livestream Audio Around the Voice
The spoken voice is normally the reference point for the entire program. Set it first, then add music, remote guests, video playback, and effects underneath it. If a viewer must choose between hearing the host and hearing the background track, the mix is not doing its job.
For most talk-driven streams, background music should sit far below speech and drop further when the presenter begins talking. This is called ducking or sidechain compression. It can be useful for countdown screens, transitions, worship services, product demonstrations, and corporate presentations, but manual control is sometimes better. A music bed that sounds right during rehearsal may compete with a quieter live speaker.
Remote guests need special attention because their microphones, rooms, and internet connections are outside your control. Ask guests to use headphones to prevent echo and to mute any unused devices that may join the call with an open microphone. Bring each guest up one at a time during soundcheck, compare their speech level against the host, and make a note of the required adjustment.
Video playback and presentation audio can be louder than live microphones. Test any clips at their real output level, including advertisements, stingers, and screen-share audio. A source that is only slightly too loud becomes jarring after a camera switch. In a multi-camera production using a CineTreak switcher or software control room, assign clear labels to every audio source so an operator can verify what is live before taking it to program.
Keep Audio and Video in Time
Good levels will not save a stream if lips and speech are visibly out of sync. Cameras, frame conversion, NDI sources, capture devices, and streaming encoders can each add delay. Audio may arrive earlier than video, particularly when video passes through AI tracking, switching, or network transport.
Perform a simple sync check before going live. Record a person clapping on camera or speaking a short phrase with clear consonants, then review the program output. If audio leads or lags, apply delay to the faster path. Avoid judging sync only from a local preview, because the encoded program feed may have different latency.
For multi-camera productions, match the delay across every camera path. A presenter should not sound synchronized on the wide shot but noticeably delayed after cutting to a close-up. This matters in PTZ and NDI workflows, where sources may travel through different processing chains.
Monitor the Program Feed Throughout the Stream
Meters tell you whether signal exists. Headphones tell you whether the audience can understand it. Monitor the final program mix whenever possible, not just the microphone’s direct output. The program feed reveals issues such as an accidental music source, a muted guest, a distorted camera input, or audio-follow-video behavior changing levels during a cut.
Use closed-back headphones for setup and live operation when isolation is needed. Keep one ear available only if you need awareness of the room, but check the full stereo or mono program periodically. Speaker monitoring is risky near open microphones because it can cause feedback and confuse level decisions.
Build a repeatable preflight routine. Verify that each microphone is receiving signal, each presenter can hear remote participants, music and playback sources are at expected levels, and the final output has no clipping. Then test the exact format you will use on air: the correct scene layout, camera source, switcher routing, encoder, and streaming destination.
If you stream simultaneously in horizontal and vertical formats, confirm that both program paths receive the same intended audio mix. The video composition may change between formats, but a host should not become quieter or lose a guest microphone on one destination.
Make the Mix Easy to Operate Under Pressure
The most capable setup is not always the best live setup. A solo creator may benefit from a compact microphone, simple audio interface, and a few carefully tuned processing controls. A church, event team, or corporate studio may need dedicated inputs, mix-minus routing for remote callers, backup playback, and separate monitor mixes. The right configuration depends on the number of sources, operator availability, and how much can change during a show.
Label channels by source, save known-good presets, and document normal gain positions. Keep a backup microphone or alternate input ready for critical productions. If a wireless lavalier loses power or a USB device disconnects, a fast recovery matters more than a perfect tonal match.
Clear livestream sound comes from disciplined source selection, correct gain, modest processing, and continuous monitoring. Set up the workflow so the operator can hear problems early and make small corrections quickly. That is how a production stays intelligible when the schedule is live and there is no second take.